HOW TO SET UP?
The system must recognize your Numark NDX-500 device/s before configuring in DJ ProMixer.
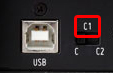
IMPORTANT: Numark NDX-500 is a MIDI and audio sound card device
MIDI CONFIGURATION
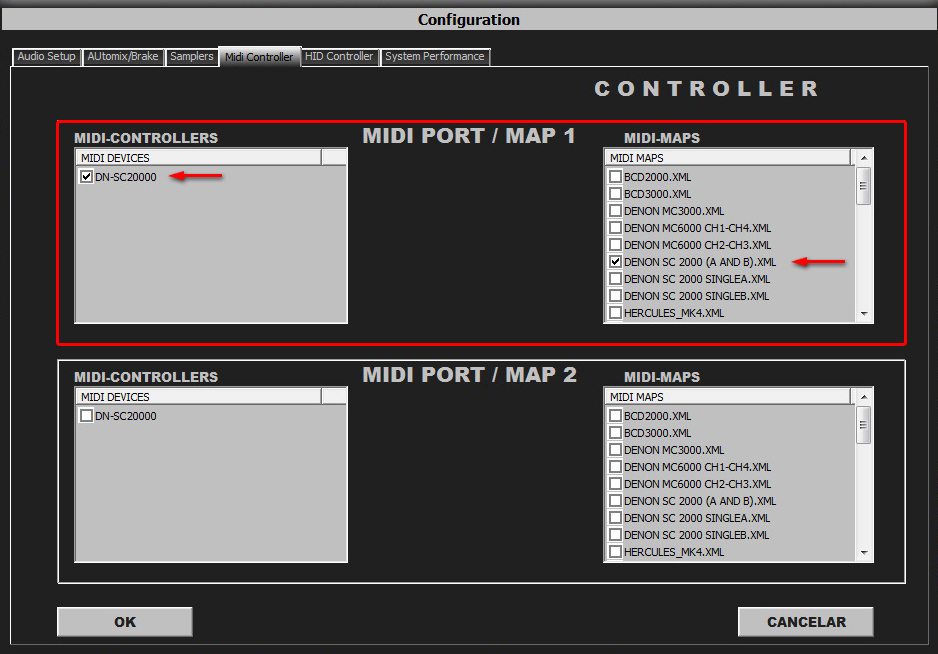
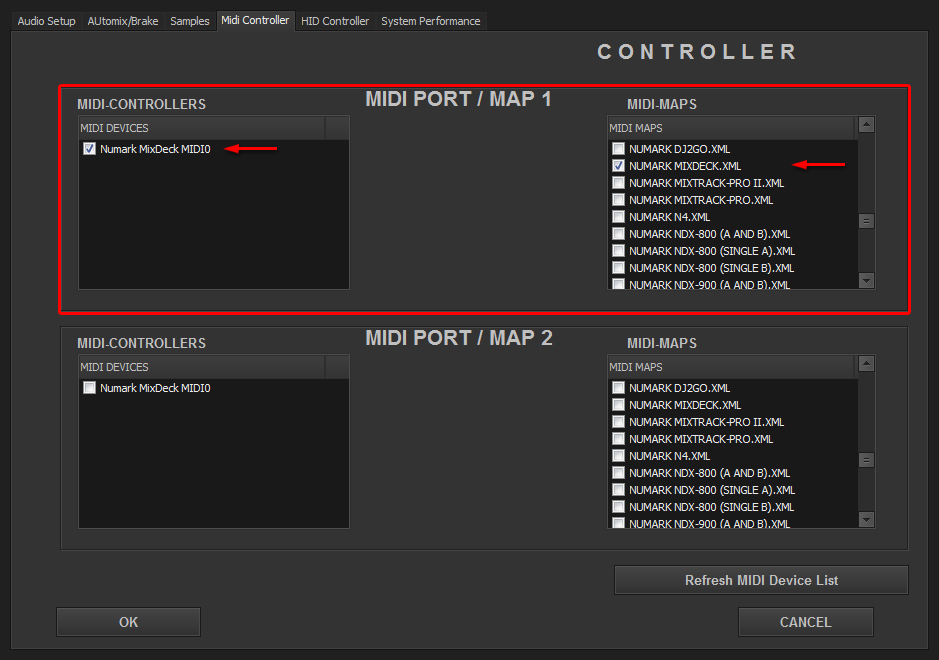
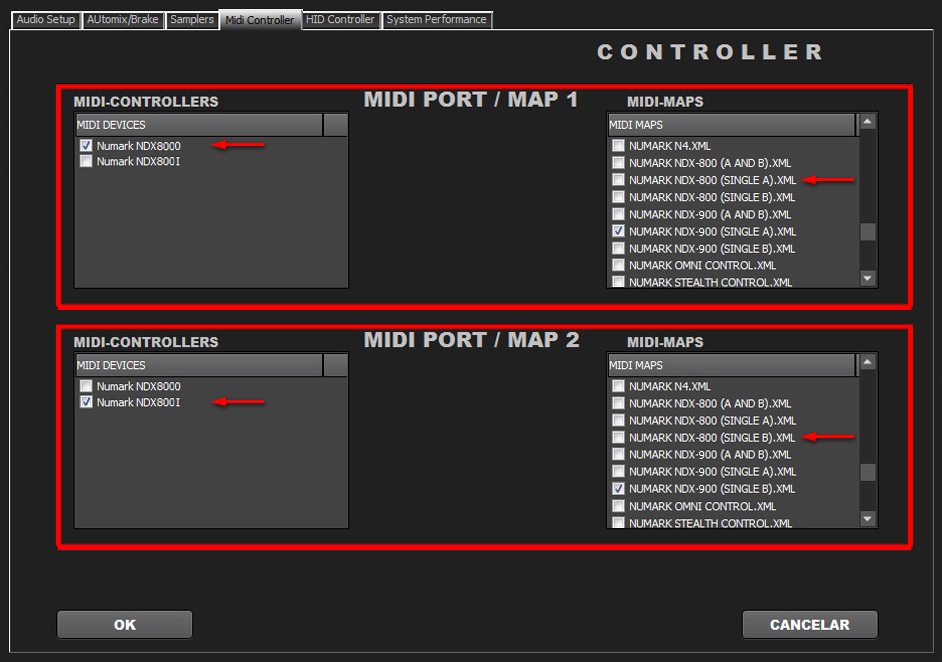
Single Mode (2 Numark NDX-500 Connected)
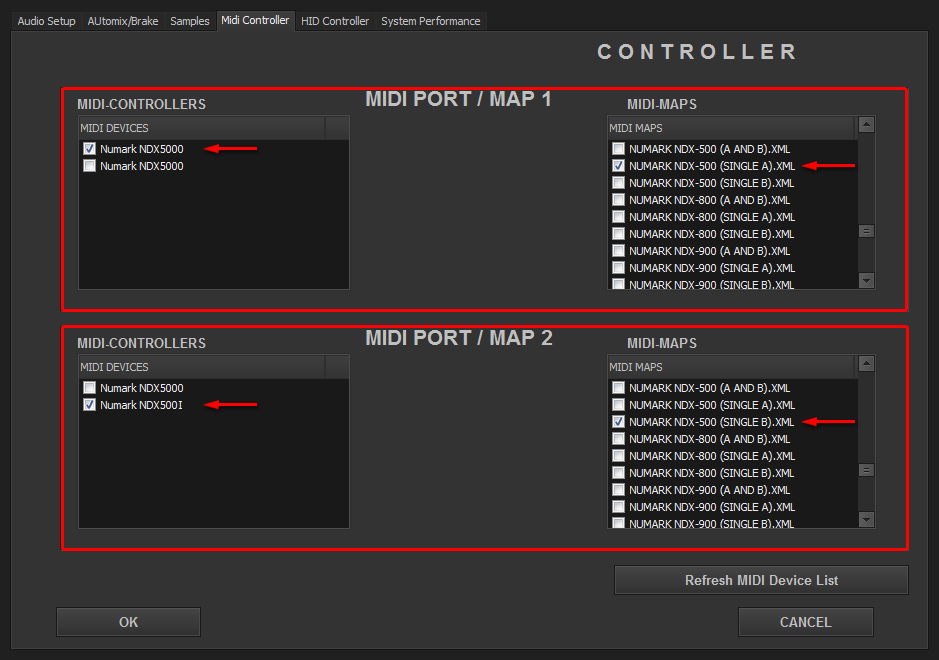
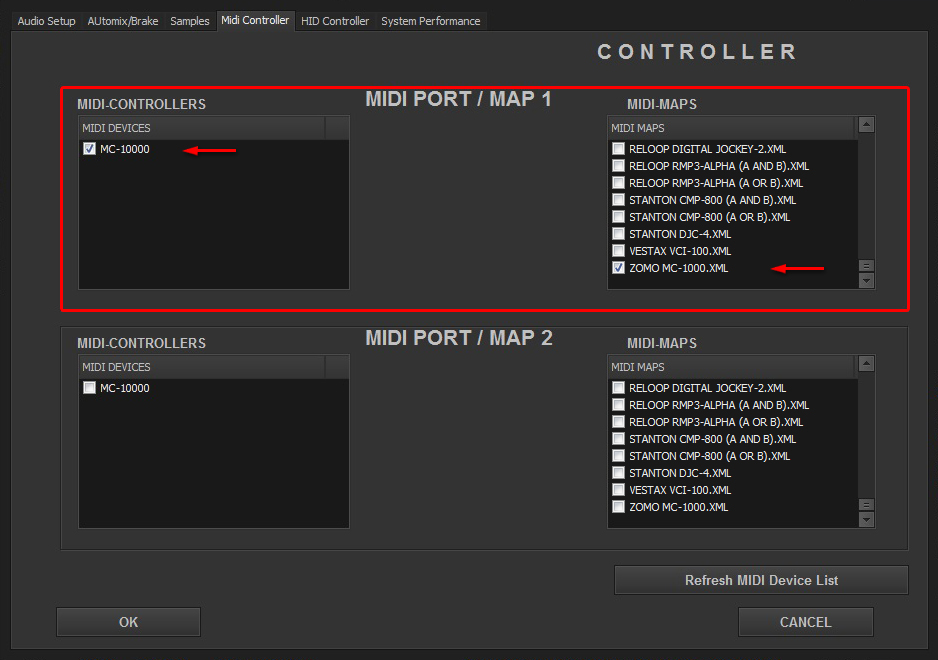
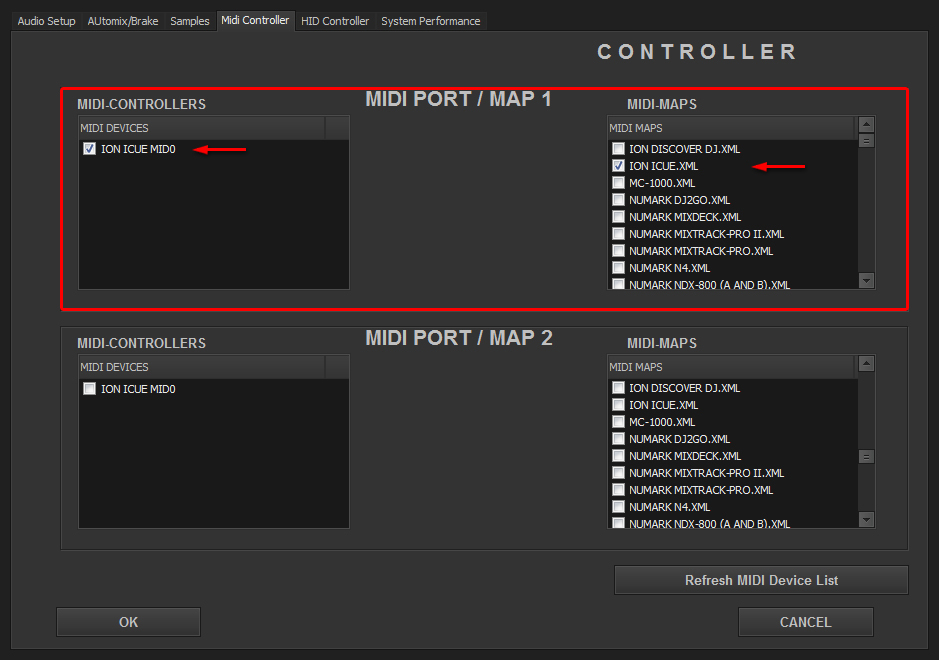
Select in MIDI PORT / MIDI MAP 1 on the left side one device (Numark NDX500 0) and select on the right side NUMARK NDX-500(SINGLE A).XML. Select in MIDI PORT / MIDI MAP 2 on the left side the other device (Numark NDX500 I) and select on the right side NUMARK NDX-500(SINGLE B).XML
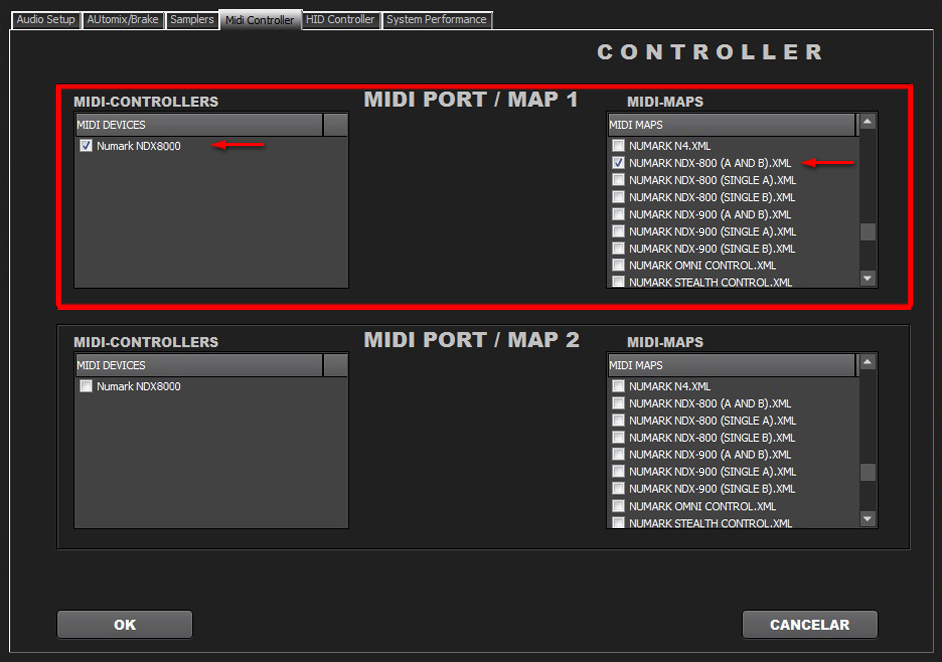
Dual Mode

Select in MIDI PORT / MIDI MAP 1 on the left side Numark NDX500 0, and select on the right side NUMARK NDX-500 (A AND B).XML. Nothing selected in MIDI PORT / MIDI MAP 2 How to change the decks? Two ways: 1.- Hardware: Use the “Single Button”. 2.- Software: By clicking the headphone button of the deck.
AUDIO CONFIGURATION
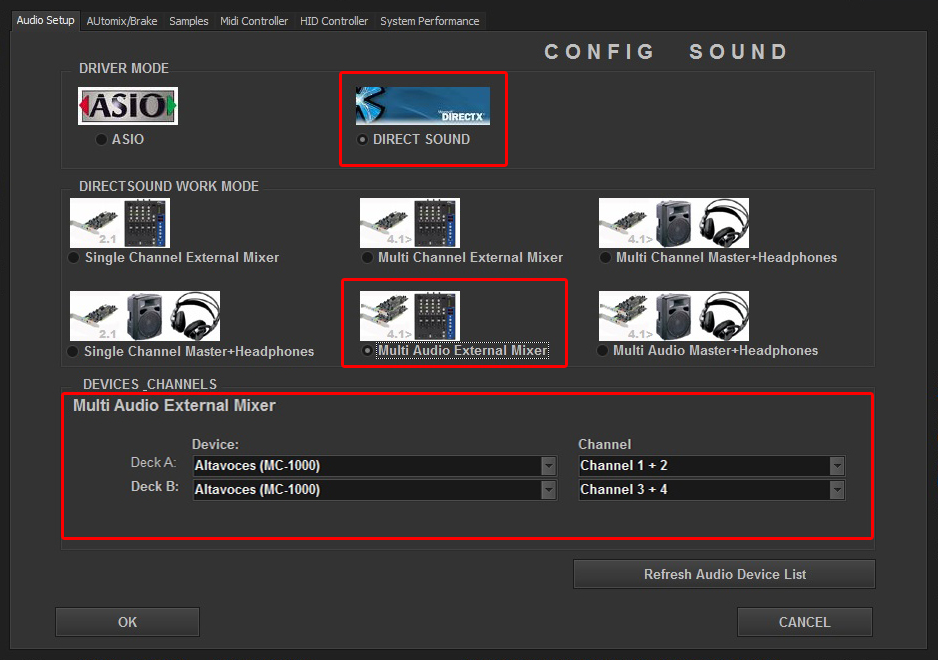
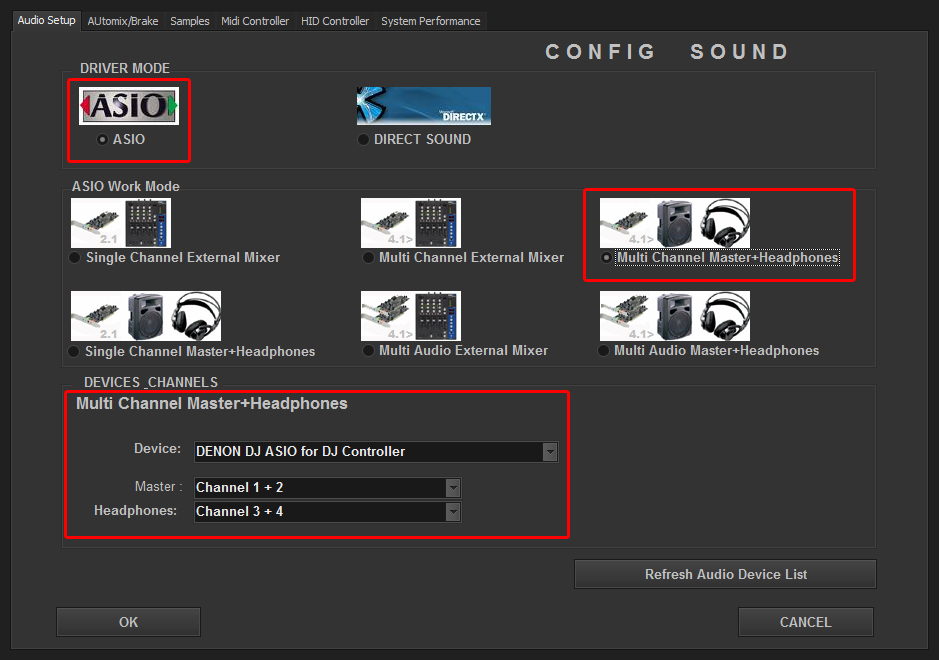
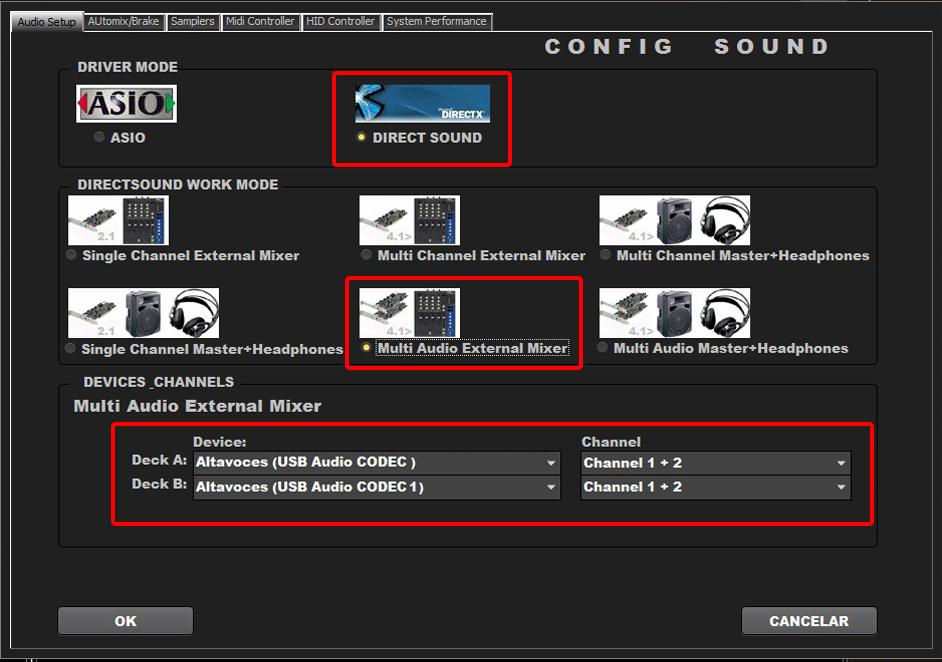
Open DJ ProMixer and go to “Config”, open “Audio Setup”, here you can select your Numark NDX-500 as Audio Sound Card.

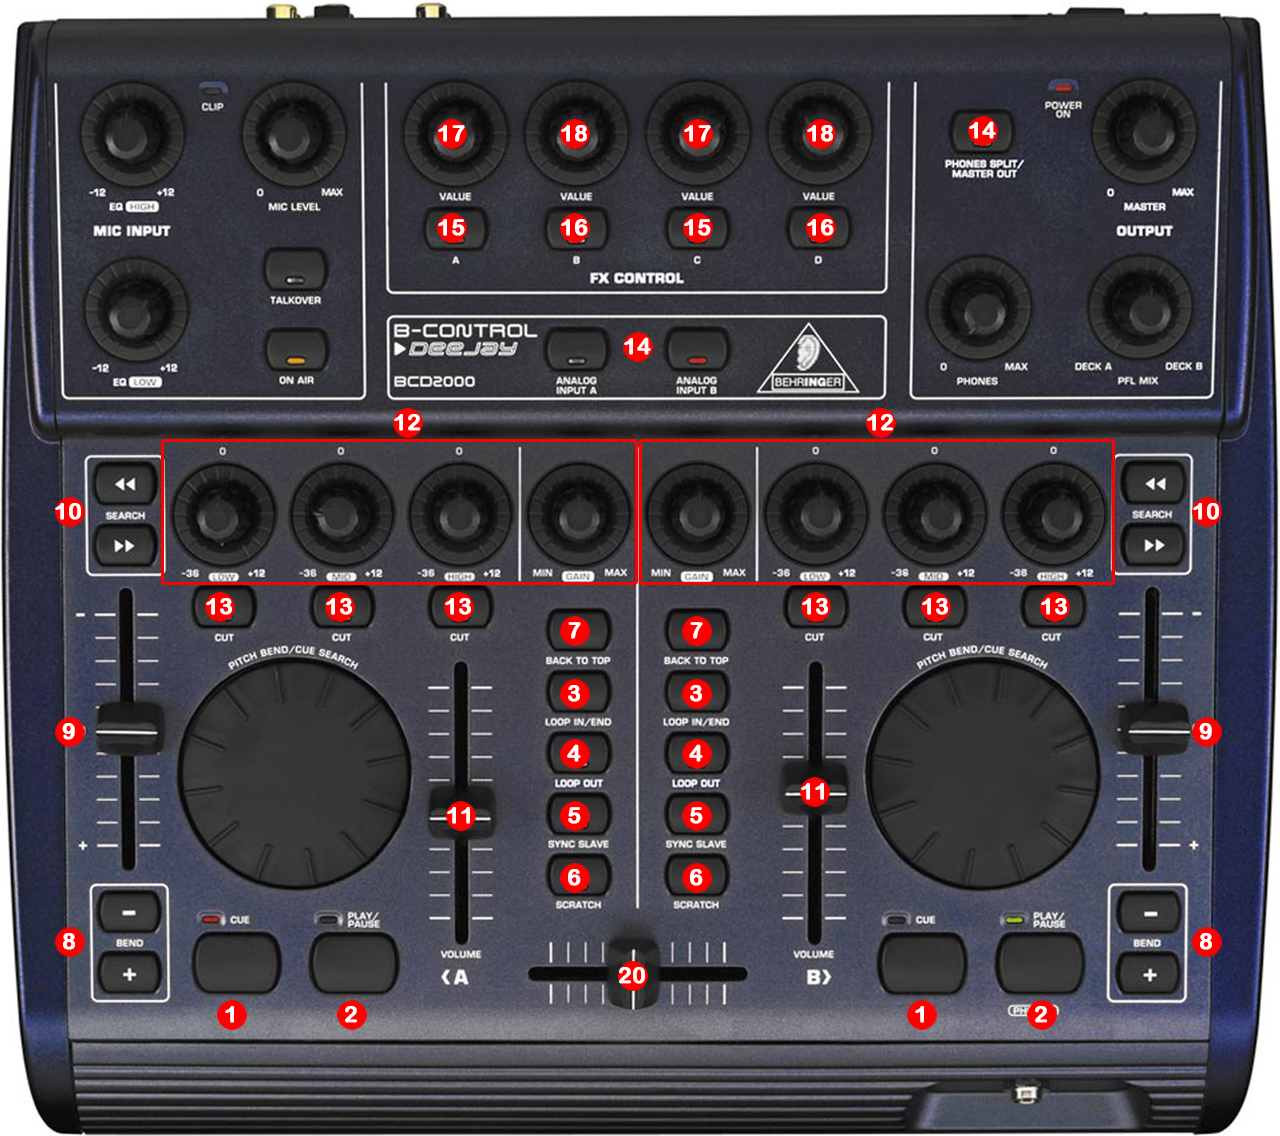
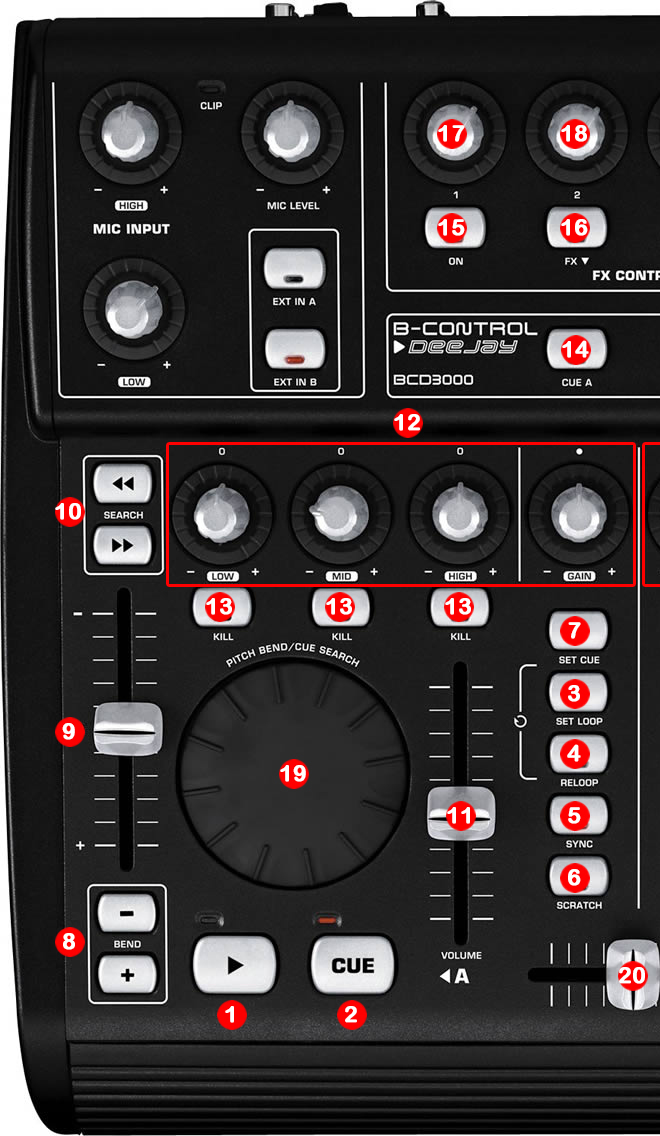
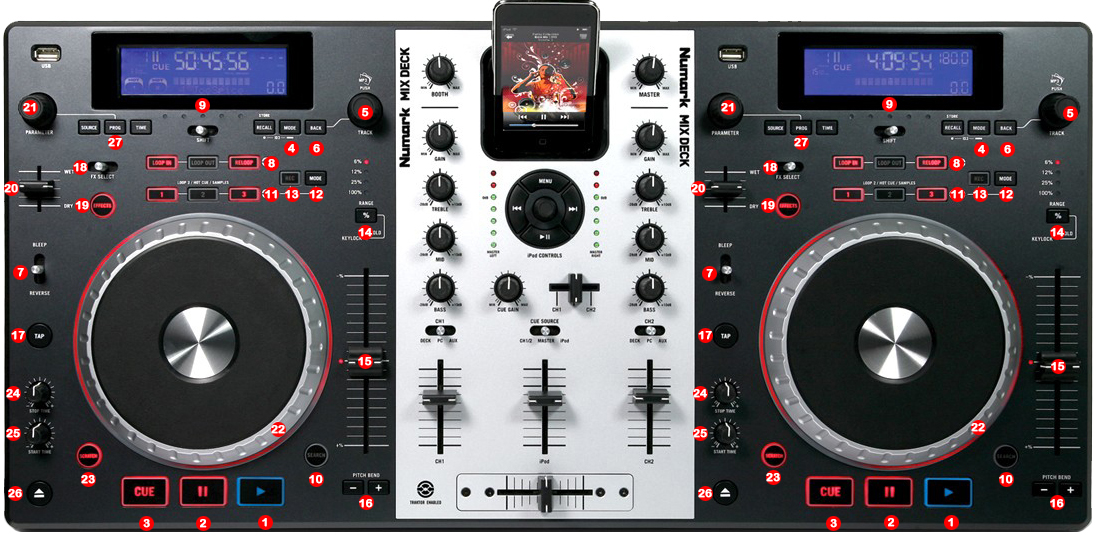
MIDI MAP
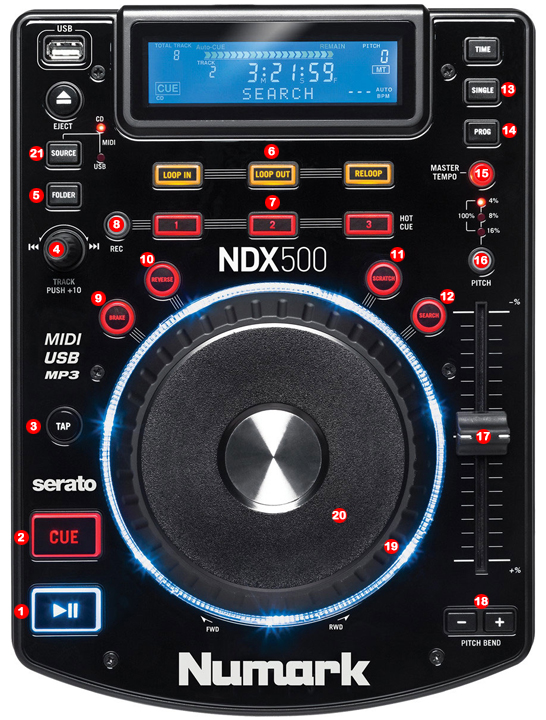
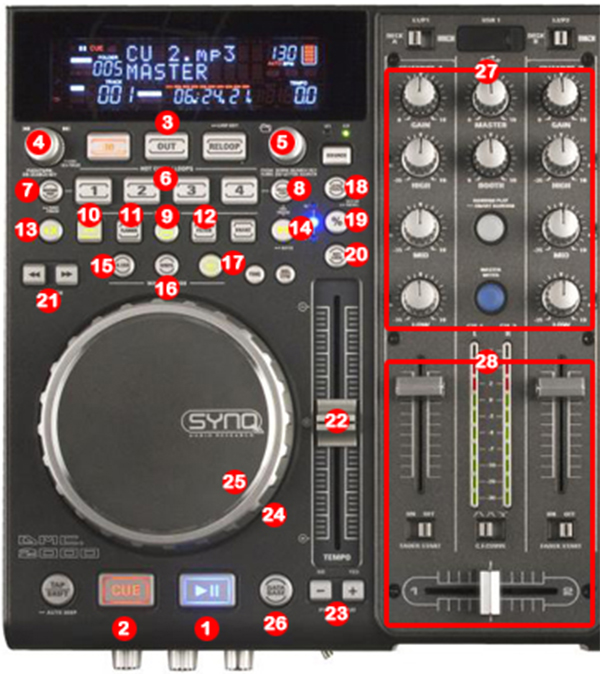
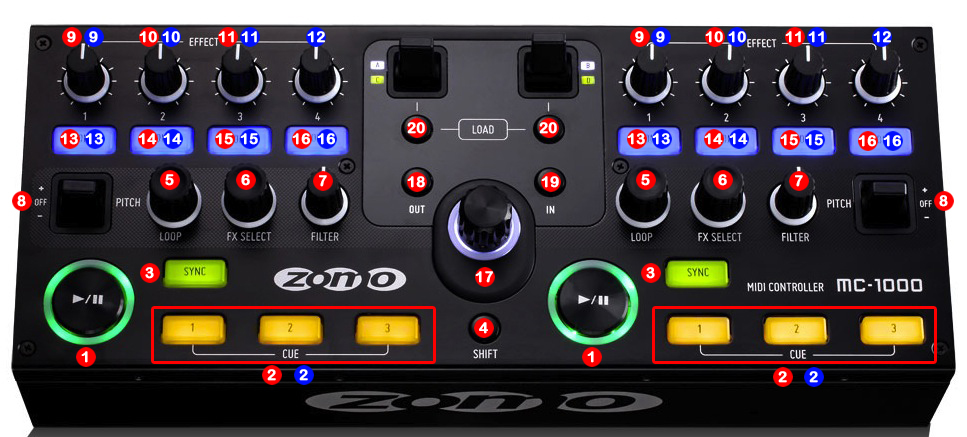
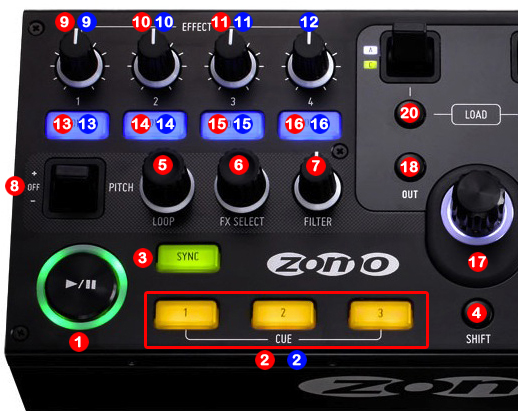
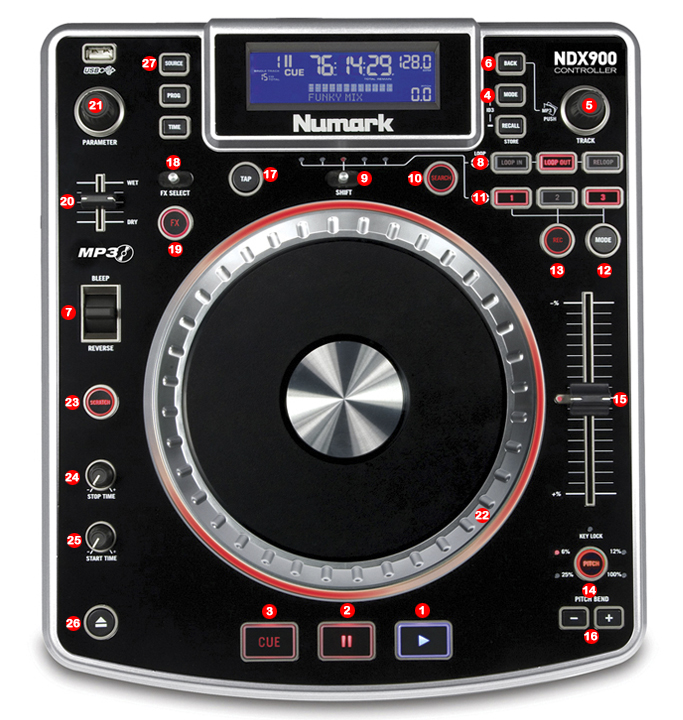
1.- PLAY / PAUSE
2.- CUE
3.- SYNC
4.- SCROLL / LOAD / ENTER
5.- CHANGE FOCUS TREE / TRACKLIST
6.- MANUAL LOOP (IN – OUT – EXIT / RELOOP)
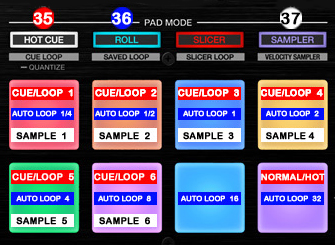
7.- CUE / LOOP MEMORY (1, 2, 3)
8.- MEMORIZE CUE / LOOP
9.- BRAKE
10.- REVERSE
11.- SCRATCH MODE (WHEEL)
12.- SEARCH MODE (WHEEL)
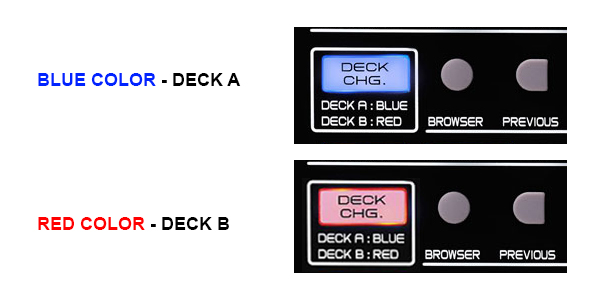
13.- DECK SELECTOR (DECK A / DECK B) (ONLY DUAL MODE)
14.- CHANGE FOCUS PLAYLIST / GROUPS-SUBGROUPS / EXPLORER
15.- PITCH
16.- PITCH BEND
17.- PITCH
18.- BEND (BUTTONS)
19.- BEND (WHEEL)
20.- WHEEL
21.- LINK TO PC (SOURCE)