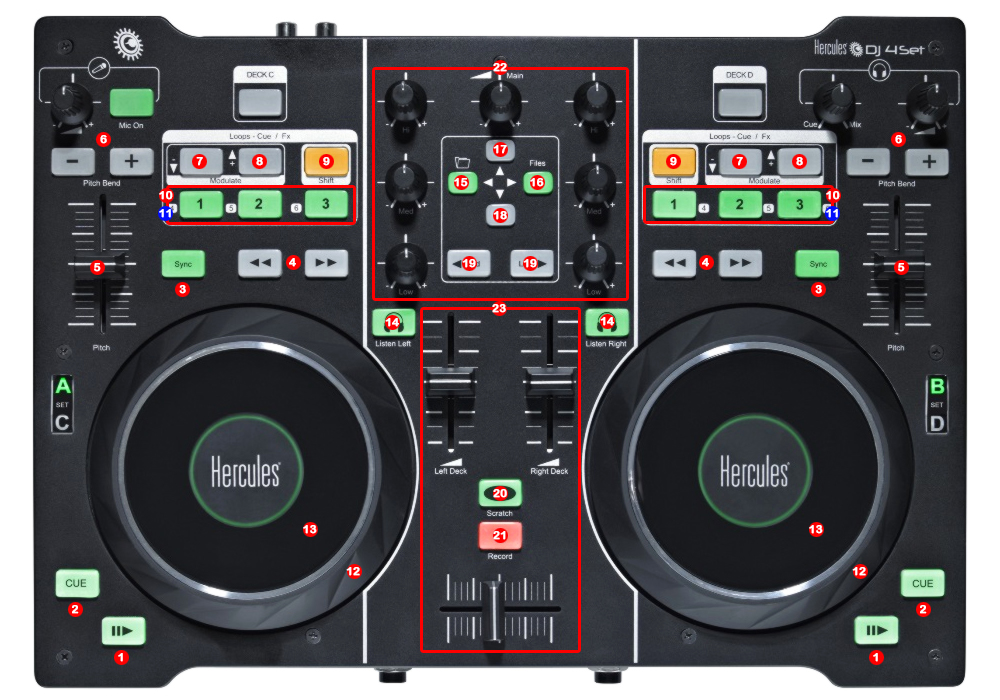
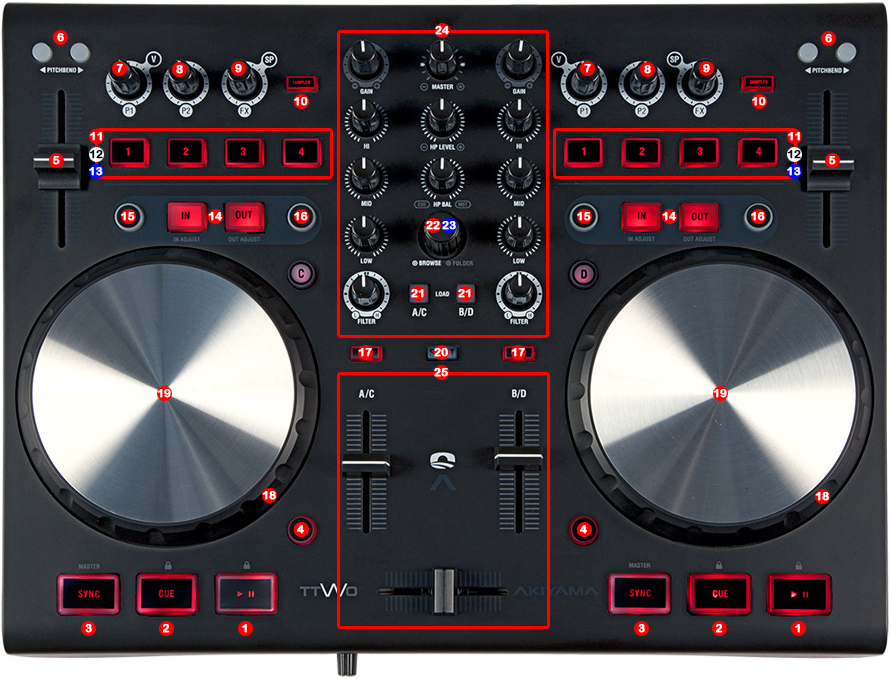
HOW TO SET UP?
The system must recognize your Vestax VCI – 100 before configuring in DJ ProMixer.
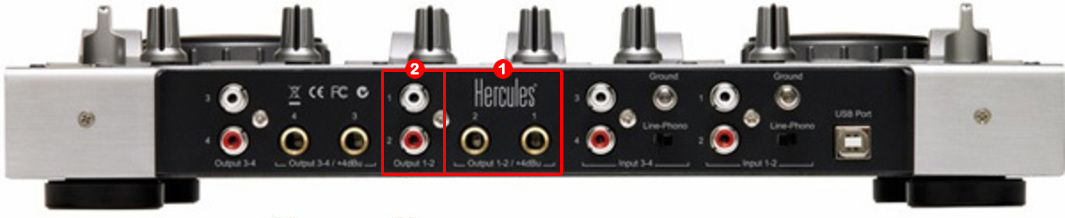
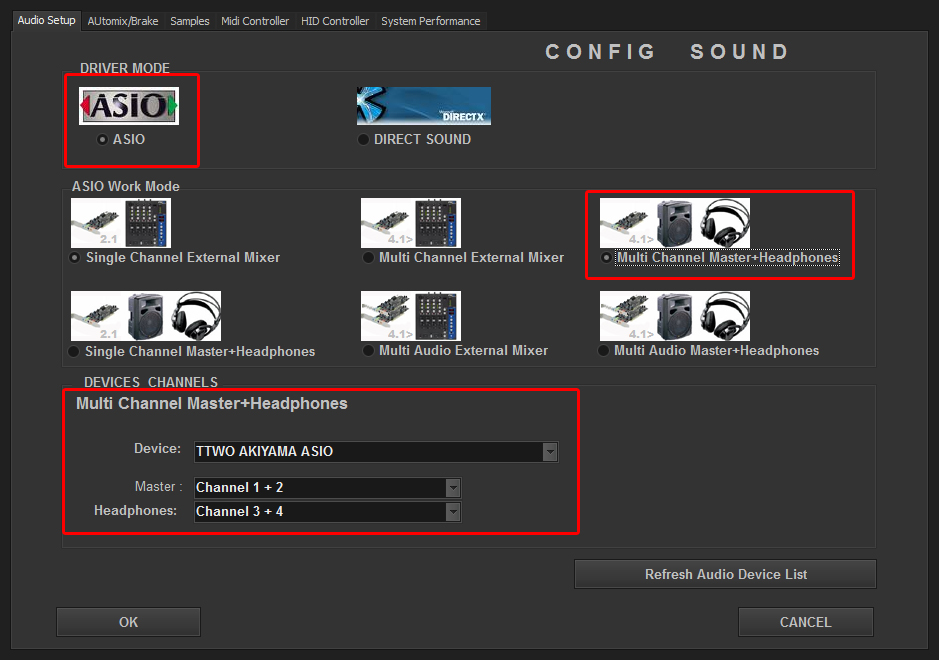
IMPORTANT: Vestax VCI – 100 is a MIDI Device (It has not integrated audio device/s) For audio configuration choose your work mode and audio sound card/s).
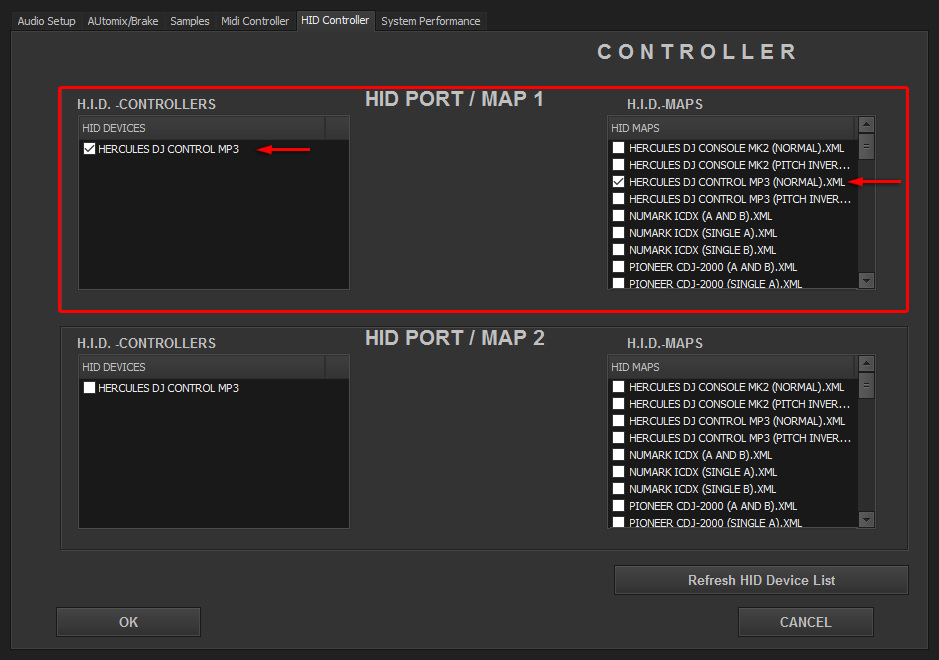
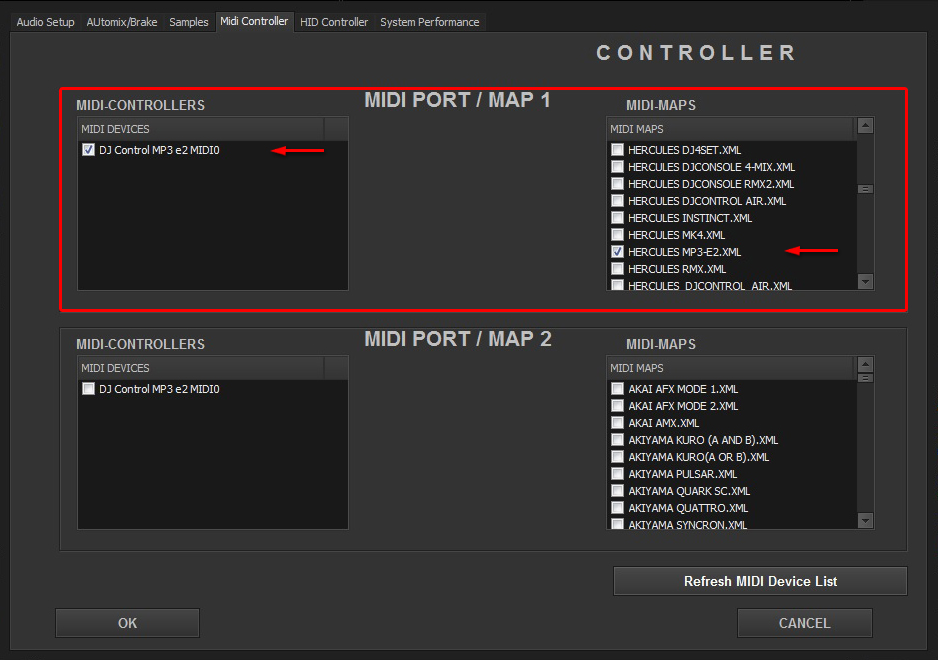
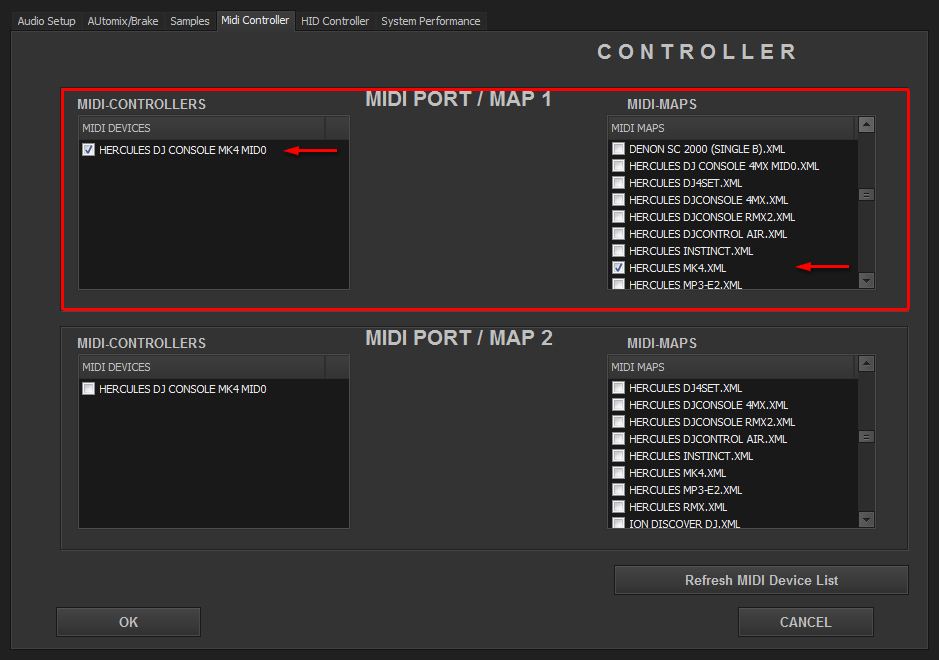
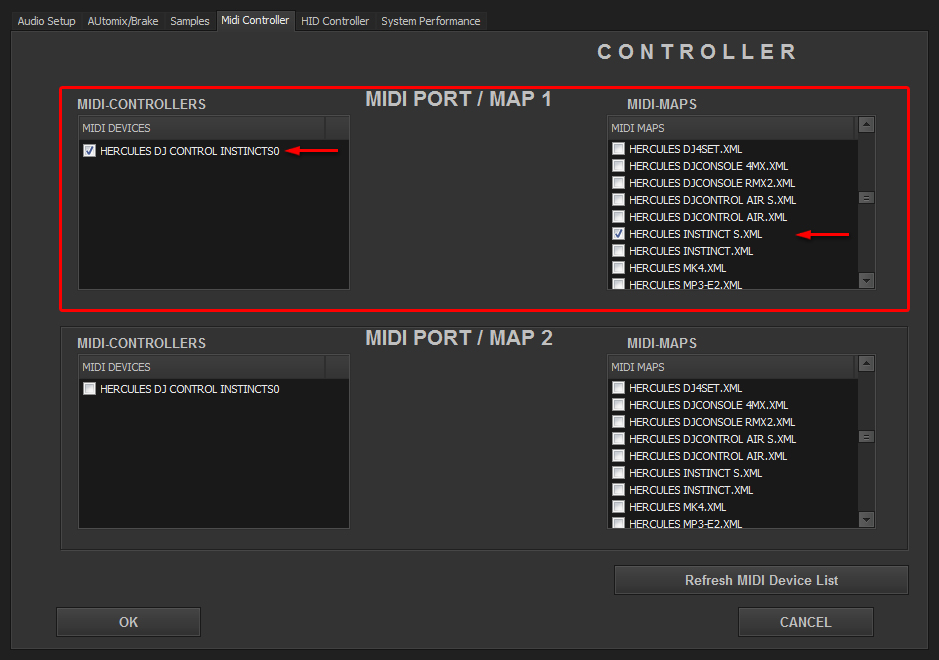
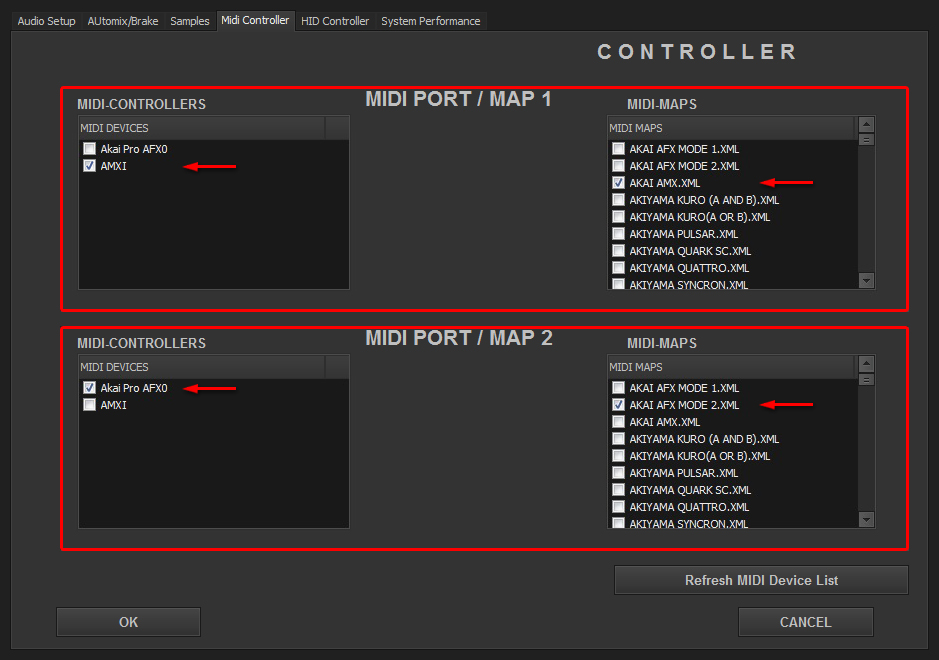
MIDI CONFIGURATION

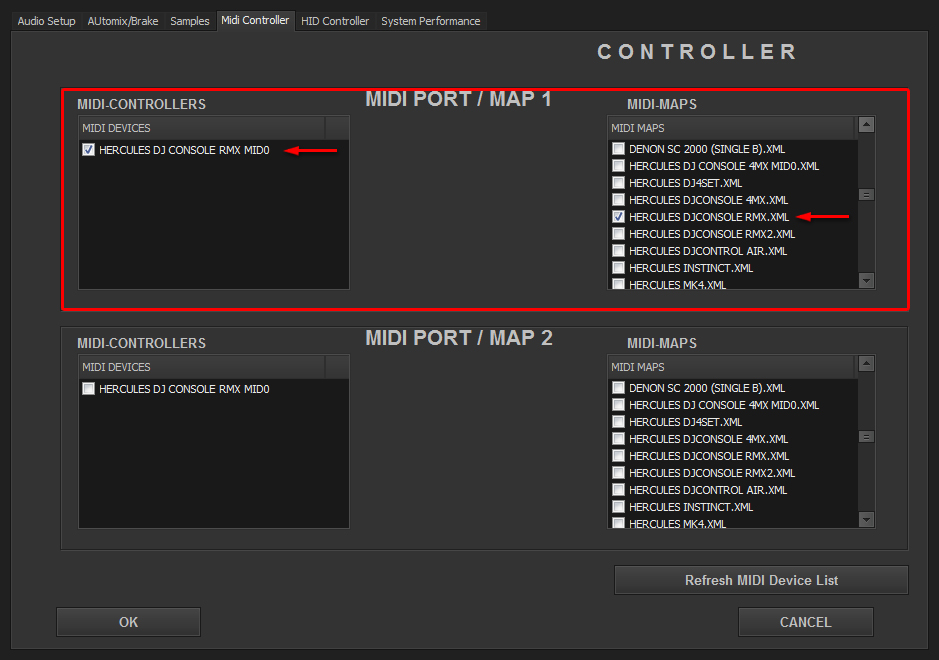
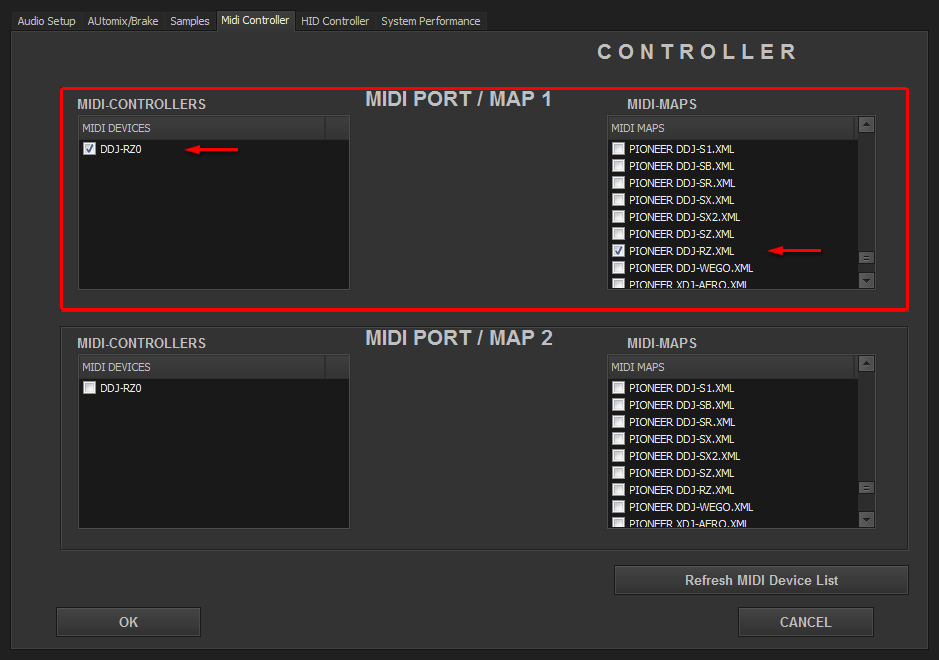
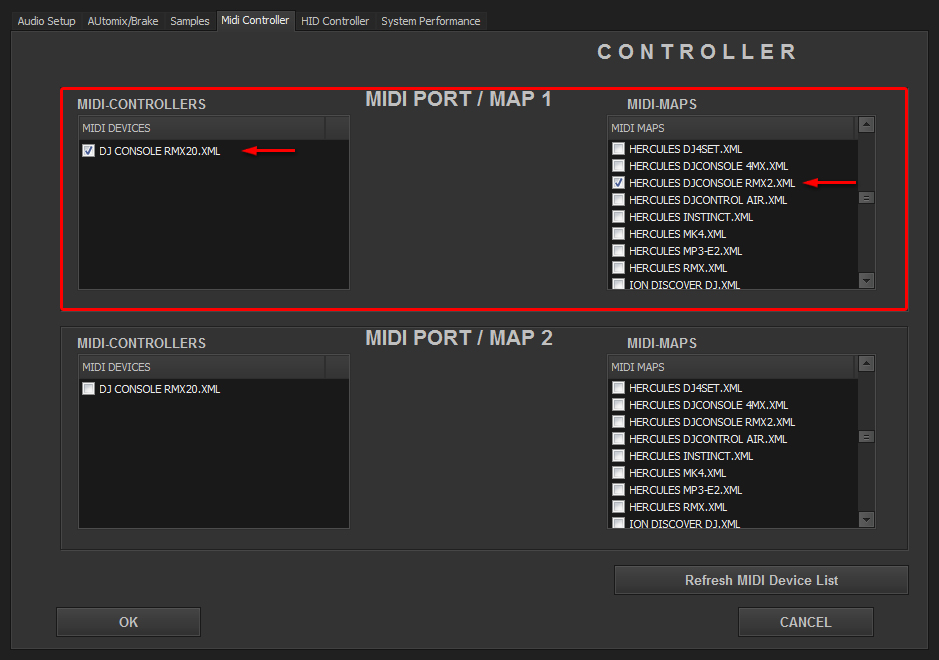
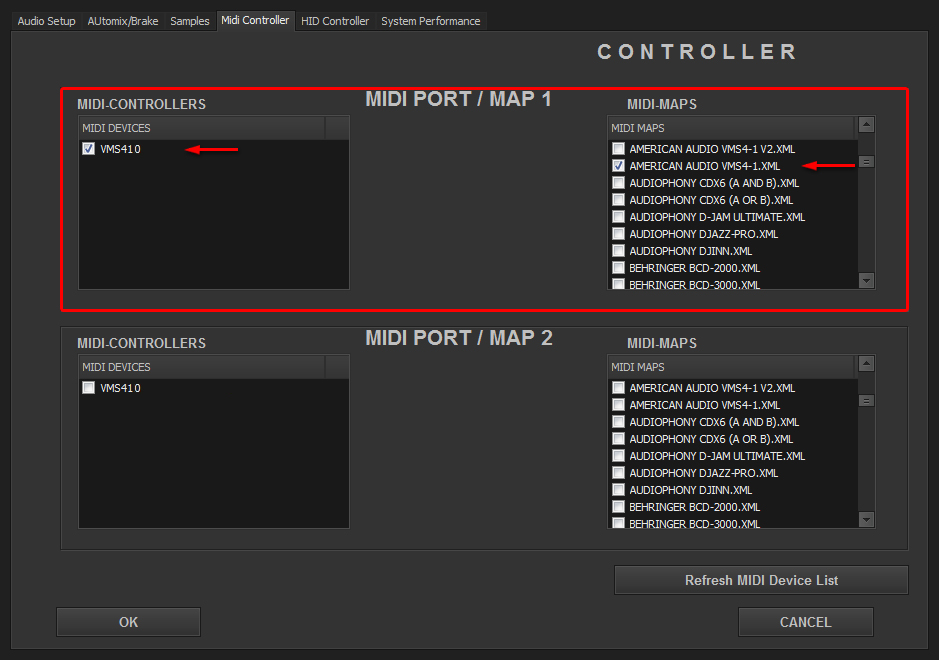
In “Config” go to “MIDI Controllers” and then select in MIDI PORT / MIDI MAP 1 on the left side one device (VESTAX VCI 100 MIDI0) and select on the right side VESTAX VCI 100.XML. MIDI PORT / MIDI MAP 2: Nothing Selected.
MIDI MAP
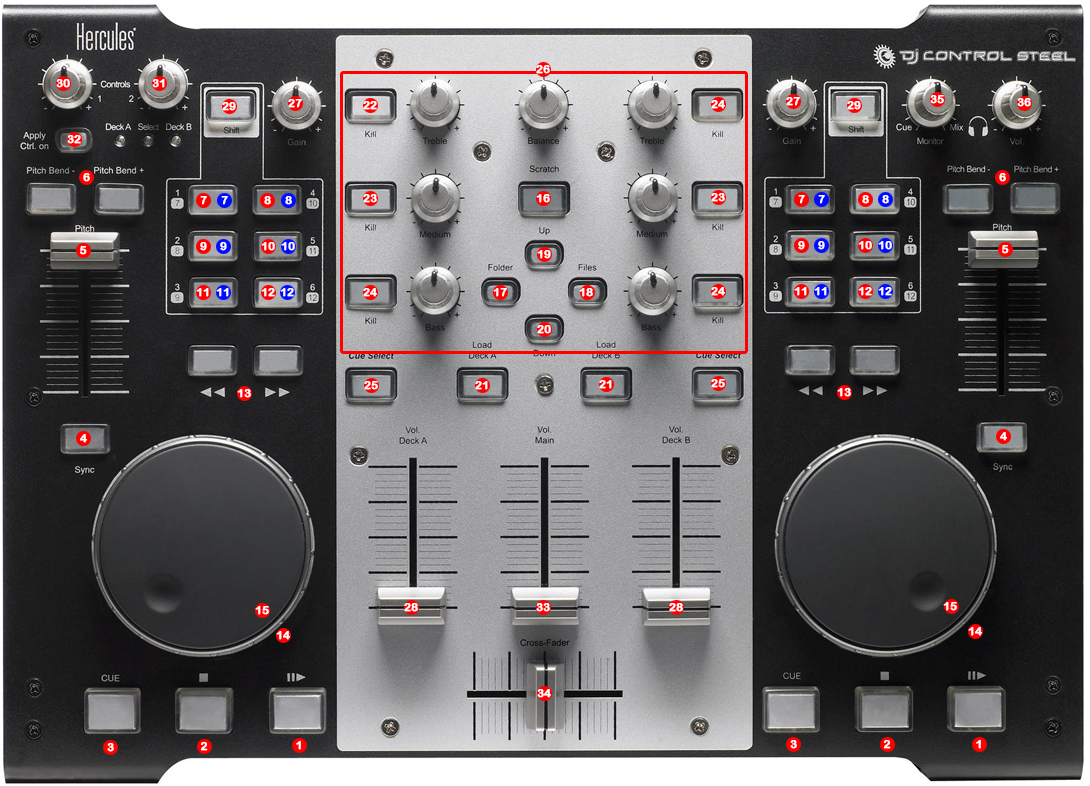
Overview
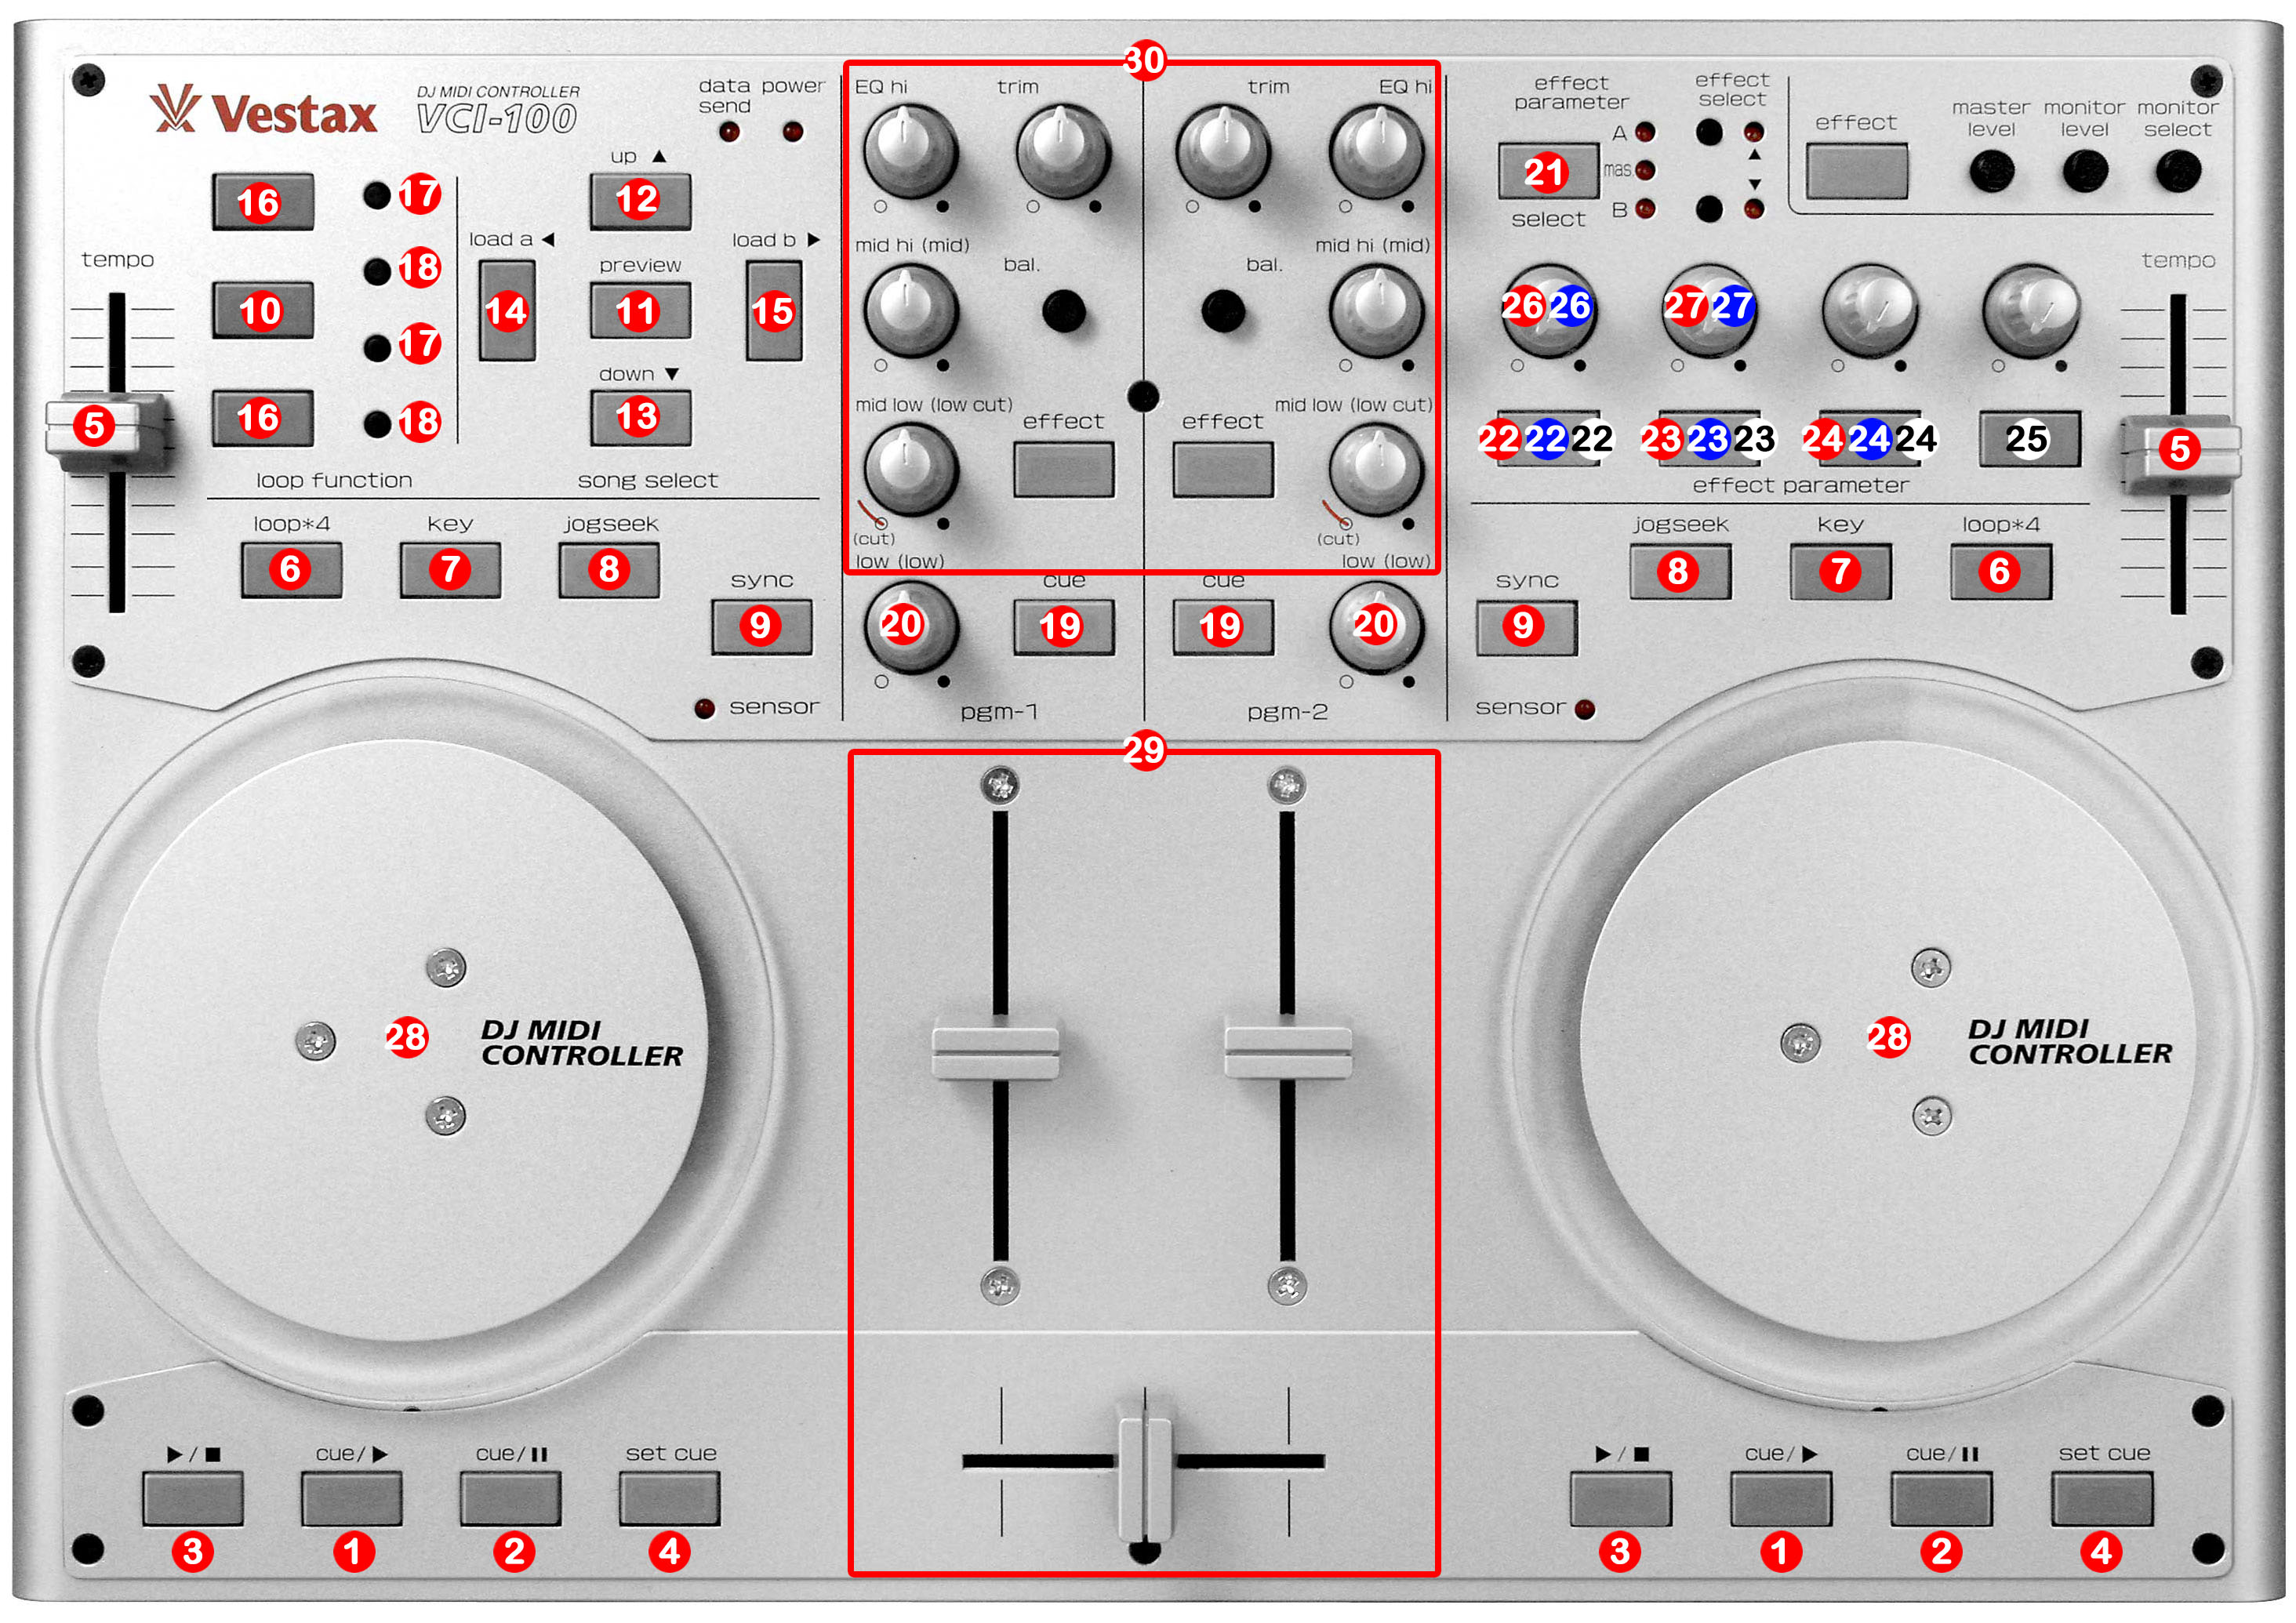
1.- PLAY
2.- PAUSE
3.- CUE
4.- CUE / LOOP MEMORY
5.- PITCH
6.- AUTO LOOP (X4)
7.- KEYLOCK
8.- VINYL MODE
9.- SYNC
TRACKLIST DETAIL

______________________________________________________________________
10.- CHANGE FOCUS TREE / TRACKLIST
11.- ENTER TREE / TRACKLIST
12.- TRACKLIST UP
13.- TRACKLIST DOWN
14.- LOAD TRACK A
15.- LOAD TRACK B
16.- EXIT / RELOOP (A / B)
17.- AUTO LOOP 1/2 (A / B)
18.- AUTO LOOP X2 (A / B)
______________________________________________________________________
19.- PFL
20.- HEADPHONES VOLUMEN
FX / CUE DETAIL

______________________________________________________________________
21.- SELECTOR FX-A / FX-B / CUE
22.- SELECTOR A POSITION (RED): DECK A FX 1: ECHO
22.- SELECTOR B POSITION (BLUE): DECK B FX 1: ECHO
22.- SELECTOR mas POSITION (WHITE): DECK A CUE / LOOP MEM MOVE “<”
23.- SELECTOR A POSITION (RED): DECK A FX 2: FLANGER
23.- SELECTOR B POSITION (BLUE): DECK B FX 2: FLANGER
23.- SELECTOR mas POSITION (WHITE): DECK A CUE / LOOP MEM MOVE “>”
24.- SELECTOR A POSITION (RED): DECK A FX 3: WAH
24.- SELECTOR B POSITION (BLUE): DECK B FX 3: WAH
24.- SELECTOR mas POSITION (WHITE): DECK B CUE / LOOP MEM MOVE “<”
25.- SELECTOR mas POSITION (WHITE): DECK B CUE / LOOP MEM MOVE “>”
26.- SELECTOR A POSITION (RED): DECK A FX DRY/WET
26.- SELECTOR B POSITION (BLUE): DECK B FX DRY/WET
27.- SELECTOR A POSITION (RED): DECK A FX PARAMETER
27.- SELECTOR B POSITION (BLUE): DECK B FX PARAMETER
______________________________________________________________________
28.- WHEELS
29.- VOLUMEN CONTROLS AND CROSSFADER
30.- ROTARY KNOBS OF THE MIXER (GAIN, HI, MID,BASS) / KILL = PUSH (HI, MID, BASS)